Features
Bracketing
One of our favorite things about using X-E1
is taking photos in low light with reasonable confidence that we will probably
have usable photos with good details. A variety of bracketing modes allow us to
take advantage of that confidence, diversified exposure and individual ISO.
Accessed from the Drive menu, the
bracketing options of the X-E1 consist of Exposure, ISO, Film Simulation, and
Dynamic Range (specific details in our review of the X-Pro1, and scroll down to
Dynamic range extension modes). Although they seemed a bit redundant at first,
when we used a few modes to solve the special problems, we were able to see
many more of their value.
Exposure bracketing
Exposure bracketing is basic bracketing
mode that we are all familiar, where the camera captures an image at the
selected exposure level of the camera, then varies it by the stipulated level
of both the upper and under-exposure image in the next two constant shots. These
images were produced in Program mode.
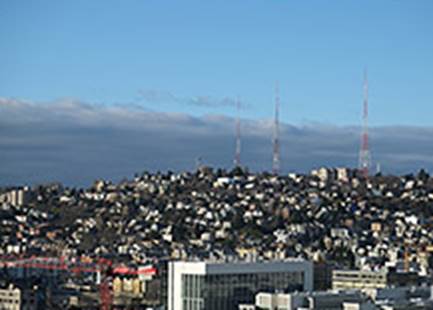
0EV:
55mm, F4, 1/1700, ISO 200

100%
crop
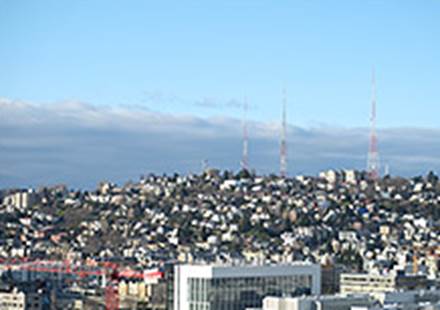
+1EV:
55mm, F4, 1/850, ISO 200

100%
crop
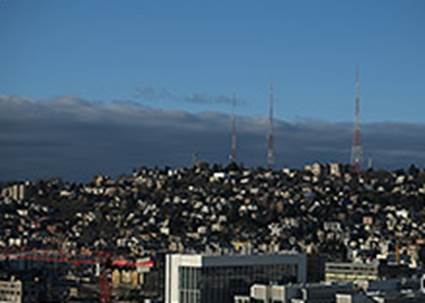
-1EV:
55mm, F4, 1/3200, ISO 200

100%
crop
The camera made a good selection in the
first shot, balancing the photos beautifully, but there are some cases in which
a slightly darker or brighter photo area would be preferable (if the clouds in
this scene were high and the white, for example, rather than low and dark
gray). The X-E1 is capable of recording both RAW and JPEG files in this
bracketing mode.
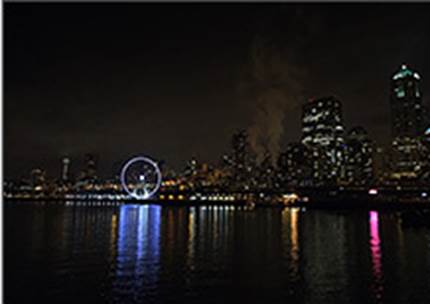
ISO bracketing
Maybe the most interesting of the three
bracketing modes is the ISO mode, setting up the exposure at programmed or
preset values and taking three exposures at three ISO settings.
18mm,
F2.8, 1/60, ISO 6400
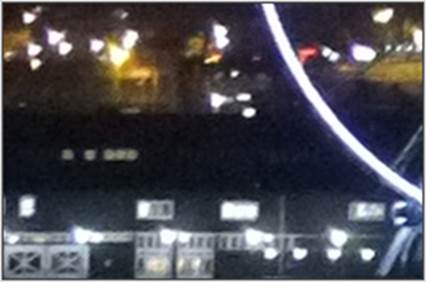
100%
crop
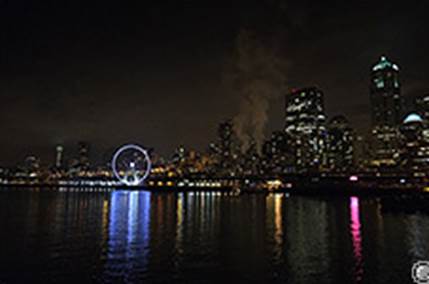
18mm,
F2.8, 1/60, ISO 8000
100%
crop
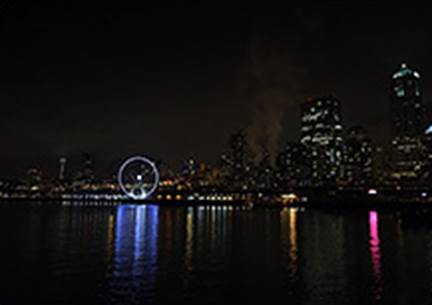
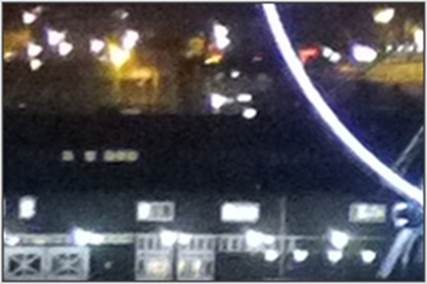
18mm,
F2.8, 1/60, ISO 5000
100%
crop
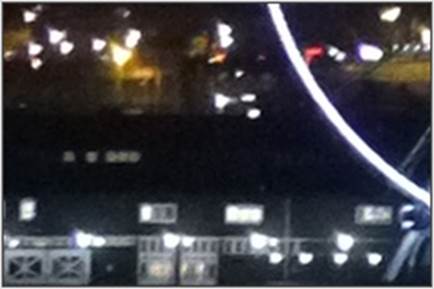
Here, we used the XF 18-55mm F2.8-4 R LM
OIS zoom at 18mm (28mm equivalent) to take a photo of the Seattle skyline while
approaching on a ferry. The priority here was a sharp photo and after a few
tests, we set 1/60 second as a low enough shutter speed to get acceptable sharpness,
and switched to shutter priority mode.
Standing on the ferry which was moving, we
just had a moment to get the right frame, and with ISO Bracketing installed +/-
1/3EV, the camera set the aperture to F2.8, and chose three exposures at ISO
6400, ISO 8000 and ISO 5000. Of the three, we prefer the over-exposed ISO 80000
image for its brighter sky; your favorite can be various. Noise is higher in that
photo as we would expect, but not essential. Of course, by casting everything
into manual mode (including ISO) we were able to achieve the same result by
trying the exposure settings, but in this kind of situation, when in fact the
scene was moving, using ISO bracketing was faster and easier.
Although it is disappointing, the camera
automatically pushes you out of RAW + JPEG mode while saving these files but
does not tell you – something that also takes place in the film simulation and
operating range bracketing modes, but not in exposure bracketing mode. Even so,
when you return to normal advance, the camera will switch to RAW + JPEG mode;
this is good.
Flash
The X-E1 has an integrated flash in
addition to a standard lamp slot that we will examine below. Fujifilm offers
many flash accessories, including the EF-X20, which shares the camera’s
corresponding compact, rectangular design and has a swivel on the top mount to
compensate for flash control or set the power output by hand. However, it is
also fixed, so it can only capture directly forward, but no option for
bouncing. The larger, but cheaper EF-42 part provides a fully connected head
for more creative lighting options.
Pop-up
flash, F2.8, 1/50, ISO 800

Pop-up
bounced F2.8, 1/50, ISO 800
Film simulation modes
The X-E1 has a sphere of what Fujifilm
calls "film simulation modes". These modes include five color modes
that are named after the company’s professional film cameras- Standard /
Provia, Vivid / Velvia, Soft / Astia, Pro and Pro Neg Neg Hi Std - and a number
of monochrome modes aiming to simulate the effects of using color filters with
black and white film (yellow, red, green or no filter), adding a
"classic" Sepia-toned mode.
Using
color filters with black and white film
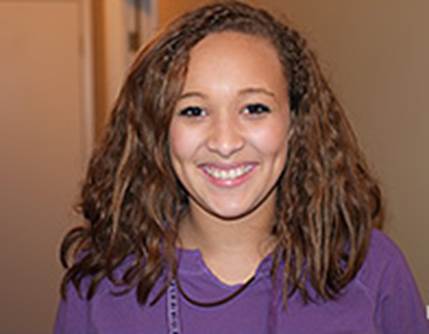
The Standard/Provia and Pro Neg Standard
modes both use the same curve that has a very open shadow tone, reducing
focused saturation and punch. One of the two, the latter is less focused, and
therefore the color mode of the X-E1 is the most neutral; we think it is the
best choice for natural portraits. We are rather curious to see that the Astia
/ Soft mode is really higher in contrast and (as with the X100) better for
everyday shooting. Meanwhile the Neg Pro High is a bit of more contrast, but
the color is less focused.
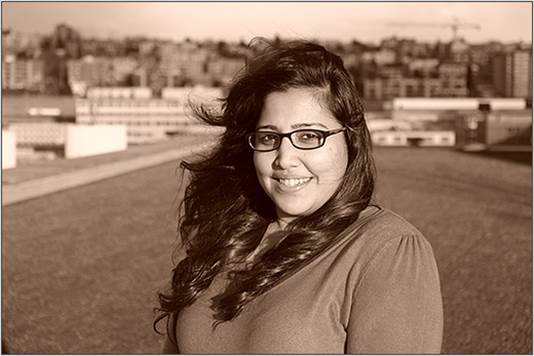
The Vivid/Velvia mode clearly lives up to
its name - we have been unconvinced that it provides exactly the same
appearance as the film icon that it is named after, but it is certainly lively
and focused. Highlights tend to burst more easily, though, and we may be
tempted to rotate the Highlight Tone down a notch. For single modes, we would
tend to use a red filter mode for landscapes and green filter for portraits.
The X-E1 provides a good deal of control
through its JPEG processing, you are able to adjust the color intensity,
sharpening and noise reduction and even set the shadow and highlight tone
(contrast) independently. However, the Film Simulation mode cannot be tweaked
separately to match your tastes, instead of that any changes you make to the
diverse processing settings are commonly used on all of them.
This solution is to save any tweaks that
are preferred among the settings of customers, which can then be brought
through the Q menu. However, it is important to remember that these backups
hold both ISO and DR settings too. It's also worth remembering that if you
shoot raw, you can freely control through all of these processing parameters
when using them in the camera raw development in the playback modes.
Movie mode
For a panoramic view over the videos, have
a look at the Movie section of Fujifilm X-Pro1 review. This video camera has
18-55mm lens, which is image-stabilized.
Panorama
Its classic beauty and relatively small
size make the Fujifilm X-E1 appear to be an ideal choice for travel, and one of
the things makes it easy is quick panoramic images. The camera’s mechanical
shutter creates a bit of noise as you are sweeping across the scene, but the
result looks beautiful because of the images stitched together in a surprising
way. The Drive mode menu is where you choose Panorama, and then you are able to
set the panning direction and shoot in horizontal or vertical format through
the right arrow key. Vertical is preferred for scenes with higher objects, such
as trees or the Seattle Space Needle, panning direction depends on how
comfortable your feel. You are also able to set the width of the machine
direction, Medium or Large.
·
Angle 180° Vertical Direction Dimensions 7680 x
2160 Size 15.8 MP
·
Angle 180° Horizontal Direction Dimensions 7680
x 1440 Size 10.5 MP
·
Angle 120° Vertical Direction Dimensions 5120 x
2160 Size 10.5 MP
·
Angle 120° Horizontal Direction Dimensions 5120
x 1440 Size 5120 x 1440
Panning direction needs a little practice
to achieve the correct angle and speed, but the camera can give you a horizon
line to hold it firmly as you rotate your camera body.

Panning
direction needs a little practice
We were impressed with the results of the
panoramic shots above, especially how good it looked to process the exposure
transition through a wide expanse with the sun in the photo. But then at the
computer we found the remarkable range of colors in the sky when the exposure
was adjusted according to 180 degrees arc.
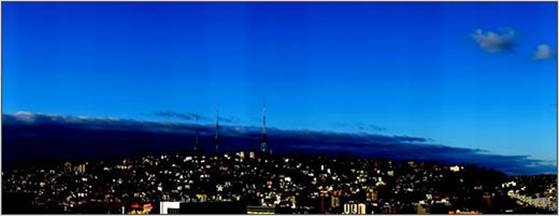
The
remarkable range of colors in the sky
Above, we cut and adjusted the levels to
indicate the clearer effect of band. Pictures taken with less exposure change
generally does not show the problem, as seen below. This image was created from
the Medium’s viewing angle.

Less
exposure change generally does not show the problem.
Both panning directions are created in the
vertical mode to shoot more of the sky and foreground.
Dynamic range expansion modes
As the X-Pro1, the Fujifilm X-E1 offers two
settings of expanded dynamic range that we will mention more extensively in our
Fujifilm X-Pro1’s review.