Access the true color and sharpness
of your image in Aperture
Difficulty:
Intermediate
Time needed:
5 minutes
When you import RAW images, Aperture tries
to make the image look good quickly, and makes automatic adjustments based on
the camera you used. This can be fine for many images, but it can make the
image look too colorful. If you do additional image editing it can lead to
fake-looking photos. The solution is to use the RAW Fine Tuning controls to
remove the automatic adjustments. At first, your image will look flat and dark,
but with a few quick tweaks you’ll soon bring out its best look.
When
you import RAW images, Aperture tries to make the image look good quickly, and
makes automatic adjustments based on the camera you used.
In the example shown here, the automatic
adjustments make the skin look garish, the nose shines, the walls look too
bright and the window appears too white. By using RAW Fine Tuning, you get
natural skin colors and a much richer image.
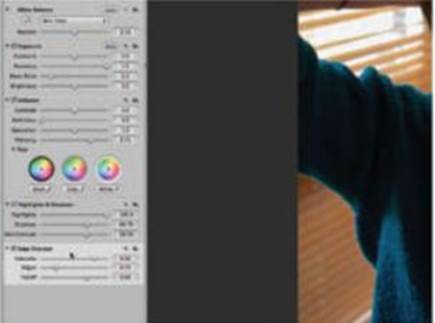
Step-by-step: Aperture Fine tuning the RAW controls
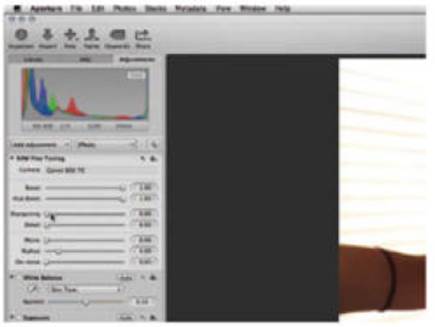
1.
RAW Fine Tuning
Import the RAW Model image and go to
Adjustment>RAW Fine Tuning. Drag the Boost, Hue Boost and Sharpening sliders
to 0.
2.
Expose and Enhance
Under Exposure, drag the Recovery slider up
to 1.5. Under Enhance drag the Vibrancy slider to about 0.7, until some color
returns to the image.
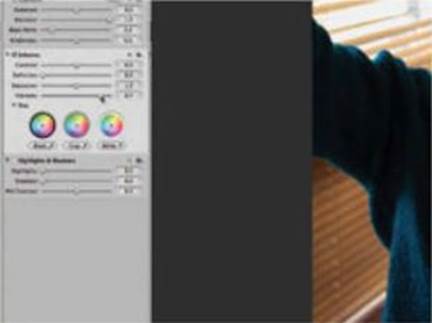
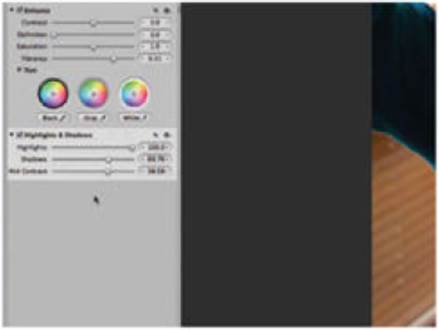
3.
Highlights & Shadows
Under Highlights & Shadows, drag the
Highlights slider all the way to 100. Drag Shadows to 70 and Mid Contrast to 40
to give balanced color and contrast.
4.
Sharpen and noise
Go to Add Adjustment>Edge Sharpen and
Add Adjustment>Noise Reduction. The default settings should work well, but you
can make slight adjustments.
The RAW details
Comparing your new image to the original
shows how effective your technique is, while using effects gives you complete
control.
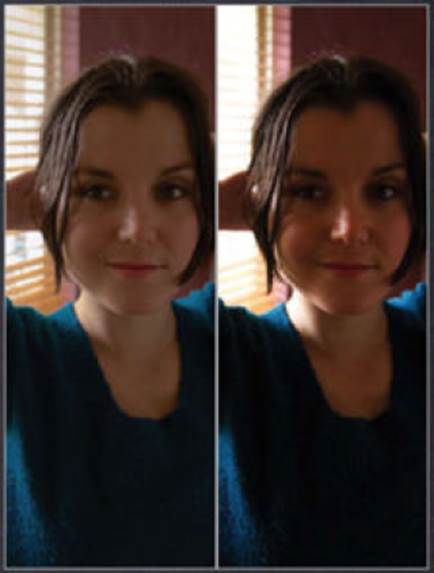
1.
Compare images
When you’ve made your adjustments, hit M to
see the original image. Hit M again to see the end result. If your new version
looks dull, wait a bit to get used to the more subtle tones.
2.
Brush in effects
With Edge Sharpen selected, click the tiny
cogwheel and choose Brush Edge Sharpness in. You now paint the effect onto the
image only where it’s required. This is far more accurate than applying it to
the whole image.